Firstly, the saddle position. It should be horizontal, not tipping back or tipping forward, but level. If you set it so that the nose (the front) is pointing down you will tend to slide down, not only putting strain on the arms and wrists, but you will constantly try to slide back, rubbing the inside of your thighs; like-wise if the nose is pointing up then your nether regions get a pounding, so make it level. The saddle also needs to be at the right height for you, there are numerous rules of thumb and mathematical formulae, such as setting the height 109% of your inside leg measurement (from the top of the saddle to the pedal axle when in the 6 o’clock position) – a reasonable starting point to begin with, however, if you are just starting out and don’t have the budget to get a professional bike fit I recommend a visit to your local bike shop who can get you at least set up there or thereabouts and correct any issues. So why is is saddle height important? You will find that if the saddle is too low, your knees will tend to push out, you will lose power and this can cause knee strain (the knee should move up and down with minimal lateral movement). If it is too high, you will need to rock your hips at the bottom of each stroke, and this movement is likely to cause back pain and again knee pain. Another indication of a saddle being too high is that when your foot is on the pedal at the bottom of the stroke it should be level, if it is pointing down (tiptoeing) the saddle needs to be dropped. If you are out for a ride and want to change the saddle height, my personal rule of thumb is that fine adjustments should be done in no more than 3mm increments. Bottom line, see your local bike shop or professional fitter.
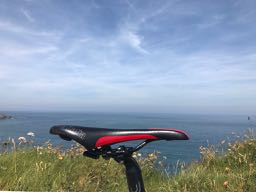
Wrong saddle type. So, when you look at modern road saddles they look more like arrow heads than the saddles of days gone by, but it really is horses for courses. A padded saddle is great for those gentle rides to the shops or picnic, you’ll see some padding on off-road and mountain bikes, but for road and touring bikes, you need a solid saddle.
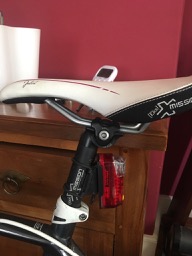
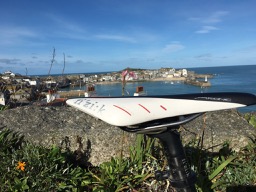
Why ? you may ask. The answer is that road saddles are designed on the premise that cushioning comes from a combination of the bike frame, the wheels, the saddle stem and in higher priced saddles, titanium rails, but not the saddle seat itself. Secondly, the speed at which you pedal is much higher on road bikes, and the rides generally longer in time/distance than say commuting, meaning that you should have as little contact and resistance as possible between you and the saddle, thereby avoiding abrasions or chaffing inside the thigh, so yes, less or more! In addition, the market has matured such that there is a huge range of saddle designs; including those that have a
cut-out running down the middle, or long nose, or short nose, how flexible you are, and because the width between your sit bones (the technical term is the ischial tuberosity bones) which are the bones that bear your weight when sitting is key, the choice of saddle design is important. Note that this will be different between men and women (a women’s sitting bones are wider apart than the man’s).
A professional fit or use of for example Selle’s IDMatch system (at good local bike shops) can measure the width and help point you in the right direction. If it sounds confusing, don’t fret we can help and we will also point you towards your local bike shop to ensure you get the right choice (good dealers will lend you a “test saddle” you can use to check if it is right for you).
Inappropriate pants. To be straight upfront, all pants are inappropriate. In my blog on Lycra and the alternatives, I made the point that cycle shorts are so effective because not only does Lycra wick away sweat, dry quickly, but lycra shorts are designed to have no seams, with padding that is usually made from an anti-bacterial material, so gives you the optimum comfort and fit. If you wear pants with them, you will sweat, you will chaff, you will get sore. To those of you thinking of putting off Lycra to begin with, wear loose fitting shorts or jogging leggings, but rather than your normal pants, get some padded pants from your local bike shop, an online store or shop such as Halfords. You won’t regret taking this advice. Bottom line (forgive the pun), as soon as you can, get into lycra shorts, avoid bright colours, black is best. For the ladies, try brands such as Velovixen, that have in-built skirts, other brands such as Pearl Izumi and Santic have similar designs.
Riding too much too soon. This is the killer; I cannot tell you how many times I hear (also from young fit people) stories of woe, where they bought or borrowed a bike for a charity ride, or simply to try out cycling as a means to get fit, and after 20 miles couldn’t sit down on the saddle and were sore for days. This is totally unnecessary. When I started cycling I limited myself to 10 miles, and stayed at that level for weeks before trying to do 20 miles. The first time I did 20 miles, I knew I’d done the extra distance/time in the saddle, but having taken the time to build up to that distance, I avoided saddle soreness. Before I forget, for longer rides use a good quality chamois cream to avoid chaffing, it makes a huge difference if you are riding more that 50 miles. You may prefer to apply it before any of your shorter rides, it might seem weird at first, but go for it, you’ll feel the difference after the ride.
In conclusion, assuming you have the right saddle and it is fitted correctly, you wear the right clothing, then gradually build stamina “in the saddle” it is easily possible to do a 4 hour, 5 hour, even 9 hour ride, and with comfort. You just need time in the saddle, the body adapts in the same way as walking a long distance or running a marathon, the body is an amazing thing! The good news is that our plans start with just 20 mins in the saddle at low intensity, and you slowly build up time and distance. This progressive approach guarantees success, minimising the chances of developing soreness where it hurts most.
Want to know more, contact us at www.cycleforfitness.com, and when it comes to saddles, get back your grin factor!