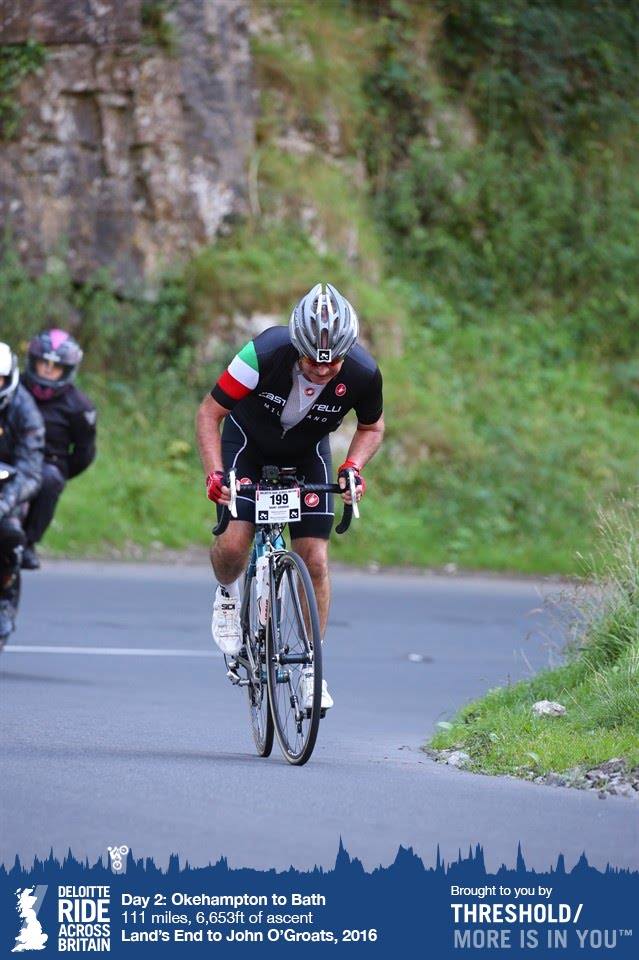
If you are a cycling athlete, ride a single speed/fixie, use a 1×11 (see footnote) or have legs as strong as oak, then move on, nothing to see here; however if you are one of the 99% like the rest of us, I’ve got some news – blind homage to the “big ring” when you are struggling up a hill, along a false flat (or on the flat if against a headwind) is a mug’s game.
Why do I say that ? Isn’t it a bit rude…. after all, the macho thing to do when riding is to get into the big ring and stay there come hell or high water, the inner ring is for sissies ! If you are new to cycling, you may be wondering what the heck I am harping on about…or if you are a seasoned cyclist, then you might find my assertion somewhat controversial.
So let me explain a little more what I mean, and if this resonates with you or you reach an ‘a-ha moment’, read on as I have some tips on smoother gear changes and how to avoid the “big ring” problems.
First of all, the “big ring” is the large chainring attached to your cranks, with either 50 teeth (called a compact) or 53 teeth (called a standard). There are other options available, but a compact is the most common for new road cyclists, with standard and above for racing and time trials (and also smaller for cyclocross bikes). You will also have a second inner ring with 34 teeth on a compact or 39 on a standard. You may also have a third, smaller inner ring on a ‘triple’ , however these are more common on touring bikes that need extra gears for climbing hills fully loaded with your tent, panniers, etc on the bike. To complete the picture, our bikes have a Cassette on the back consisting of either 9, 10 or 11 sprockets, ranging from 11 teeth to 25 teeth (or 29/30 teeth if you climb lots of hills or are not that strong yet). We use a shifter (usually) on the handlebars to move the chain across the range from the lowest gear (biggest sprocket) to the highest gear (smallest sprockets), changing the gear according to our speed, aiming to keep a constant pedal speed (cadence) whether we are on the flat, going down a hill, or climbing a hill. All these bits when put together are called the Groupset. It sounds a bit complicated but you get the hang of gears very quickly once you start to ride your bike beyond a trip to the shops 🙂 This article from cyclinguphill.com gives a good comparison of which groupset to use, but for me, all my bikes have a compact groupset to cope with the short, sharp type of the hills we get in the UK.
So what’s the problem? If you have read my previous blog “Cadence is King” you’ll understand that when we go up a hill (or any long gradient), unless we have super-human powers, we need to use our lower (easier) gears to keep going (in the same way we need to use our gears in a car).
If we adopt the strategy of keeping in the big ring come what may, as we tire or the hill kicks up, we run out of gears, our cadence slows down to the point where we are using all our strength and muscles to push those pedals around, and when it gets really steep, we may struggle to keep the bike upright, weave across the road, ultimately getting off and walk. Perhaps as an act of desperation we may finally try to change to the inner ring, but due to the tension on the chain we risk either it snapping, or it does not fully engage the inner ring, slipping or coming off altogether; in these cases we hit the deck, as per the poor chap below who had his chain slip as he’d left it too late to change, caught out by the steep hill.

On a longer ride with lots of hills, if we do manage to get up the first hills in the big ring, trying to smash it, we will have had to rely on sheer strength of our leg muscles, so we could find ourselves walking the last few hills if the legs give up. Once your legs are gone, there is no way back.
At last weekend’s Velo Birmingham I passed countless guys in the big ring, grinding their way up the early hills, red faced and eyes popping out of their sockets due to the effort, only to see them later in the ride, walking the last few hills, and I am talking young guys too, not just those of us who like to be considered as middle-aged cycling warriors 🙂
Watch this short video and see if you can see which riders are spinning it up in low gears using the inner ring, and those that are grinding up in the big ring. Which style do you prefer ?
So, given the amount of cycling blogs and Instagrams giving cycling advice, etc, why do we still see and possibly experience these types of problems. It could be because either we are getting caught out by our competitiveness, trying to beat our previous time, or wanting to beat other riders, or misled to thinking that the inner ring is for wimps (I hear phrases such as “yeah I did the whole ride in the big ring” more frequently than necessary) or simply because of a lack of awareness of the benefits that the inner ring can bring to your cycling.
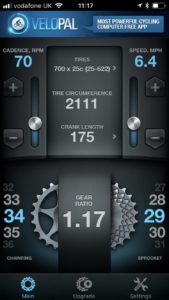
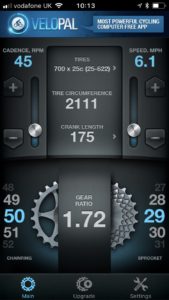
But hang on a moment, if I use the inner ring won’t I be going at a snail’s pace ? Let’s look at the maths. We should be trying to keep our cadence high ( 70rpm is a good benchmark) and use our gears to keep this pace constant. When we are in the big ring the gearing is higher (more difficult) and hence our cadence drops. In the above video you could see that the guys struggling had a cadence of probably less than 45 rpm. If we do a comparison of using the inner ring to keep a higher pace rather than using the big ring with a lower cadence you can see from the screenshots below that by moving to the inner ring (34 teeth) allow you to maintain, if not increase your speed (in this example) from 6.1mph to 6.4mph, and importantly, because it is an easier gear, you do not need to strain yourself.
Of course this does not come for free. Cycling at a higher cadence will increase the demand on your cardiovascular system, so you will need to be more aerobically fit. That comes with regular cycling. We should consider riding throughout the year in the UK, so you do not need to put this off to the spring; a common axiom amongst cyclists is “winter miles equals summer smiles”.
So what is my advice ? Firstly, treat your inner ring as your friend. If there is a hill approaching, and you think you need to change to one of the lower gears, as you start to change down, at about the middle cog on the cassette (this is flexible to your strength and preference) change to the inner ring on the front. You may need to compensate by changing up a gear on the back, but the idea is to keep your cadence even, not grind or spin out. With practise this will become second nature. The secret is to read the road ahead of you, and change to the inner ring early; this keeps the whole process of gear changing smooth, with no sudden pressure being placed on the chain.
My second piece of advice is to anticipate the unexpected. When coming to a T-junction, as you change down the gears, also consider changing to the inner ring at the front. This will not only allow you to pull away much easier, but if the road you have pulled onto quickly becomes a hill, then you are more able to cope. Secondly, when you’ve just flown down a steep hill to say a river crossing or valley floor, it is likely that the road will now turn up the other side of the valley, so anticipate this and consider moving to the inner ring when the road starts to rise and while you still have momentum.
If you follow this advice, or at least consider it, apart from avoiding chain slip falls and running out of steam, by using the inner ring more than perhaps you do now, you will strengthen and engage your cardiovascular system (ie gain aerobic fitness), and combining this with your muscles will help you get over that hill much faster and with less effort than if you’d stuck to the big ring.
This advice applies to all cyclists, however can have a profound impact on female cyclists; by increasing cadence and using your inner ring you not only increase your aerobic fitness (chances are you have considered or have tried spinning classes anyway, so get the basic idea), but you do not need to build big leg muscles to achieve your goals.
Considering the impact on your bike, in addition to the benefits of being able to climb hills with less effort, you will prevent yourself from committing the crime of ‘chain crossing’. This is where you are in the big ring at the front and the lowest gear (biggest cog) on the back (crossing is also with the inner ring at the front and smallest cog at the back). Because ‘crossing’ pulls the chain diagonally from front to back, the entire groupset (rear cassette, chain, and chainring) are coming together at angles that result in accelerated wear, meaning you’ll need to replace your components (££) more frequently.
So if you want to enjoy your cycling, stop dreading hills, and avoid unnecessarily shelling out for new components sooner than necessary, use your inner ring. Don’t be a “big ring” mug.
Ps, check out my video on pedalling technique for tips on how to increase your cadence.
Footnote:
The 1×11. Now it would be remiss for me not to mention an upcoming groupset called the x1. With this setup, you have a single chainring at the front and a rear cassette at the back that can have 36 or even 42 teeth ! More common with cyclocross bikes due to its simplicity and ability to handle the mud and sand which form parts of a cyclocross circuit. I know a few people who have taken the plunge, it’s a leap of faith, but if the idea of using the inner ring is abhorrent, then try a 1×11.


