Nutrition and Cycling – a layman’s view

Okay, so we’ve all got our own ideas on eating when cycling, however from my own perspective it can be either too much, too little or just the wrong stuff than what our body needs to keep us going.   Just for the record, I am not a sports nutritionist, but feel that I can give you my perspective and my strategy based on many years and many thousands of miles of riding.
So first things first.  Let’s look at what we need before we ride, what we need when on the go, and what we need after riding.   Just to be sure,  I am assuming you are reading this from the view of what to eat when “riding with intent”, rather than the 2 mile commute or ride to the shops.
 Before we ride we need to “fuel up”.   It may seem common sense that anything goes… so let’s have a massive fry up ! But hold on before committing those rashers of bacon, fried eggs and snorkers to the pan, in reality, what we need are slow release (ie unrefined) carbohydrates such as oats, muesli or bran….food that our bodies will find hard to break down and hence will last several hours.  So to your obvious disappointment, fry ups are out.  Would I recommend a smoothy or fruit juice ?  Only if combined with low release foods to offset the high sugar content which would otherwise give you a quick hit but will soon send your blood sugars to the floor.
 Is pasta or rice or other processed carbs for breakfast good ? This depends on how much carbohydrate your body can cope with before getting cramps. I have seen athletes neck bowls of the stuff, so it must be okay yeah…but to a point.  All carbs are not equal, with simpler carbs less likely to cause cramping issues than those with a high fibre content, but consider your stomach to be a funnel with a wide cone at the top and a small pipe at the bottom.  In general, most of us have a small pipe, meaning that if we keep shoveling in the carbs before we can use it, our funnel overflows….ie cramps. As athletes have trained their guts to use carbs over many months or years, their “pipe” is larger, meaning that they process and so can cope with much more carb intake than the recreational cyclist.  Get the idea?   Not to stress the point, this is why if you gorge yourself on high carb training energy bars, gels and the like, it is going to backfire…sometimes literally !
 I got talking to a guy during the London 100 ride a few years ago; we were waiting at the bottom of a steep climb, stopped because it was a bottleneck and the guy had a twisted expression and beads of sweat across his brow. I asked if he was okay and he told me that he was suffering a little from the energy gels he’d consumed. I asked how many, and he said nine…we’d only been going a couple of hours.  He certainly proved that cramps come with overdoing the gels as certain as ..well now you get the bear picture.
 In some circumstances it is necessary to do a “fasted” workout….but these are generally limited to 2 hours. This doesn’t preclude a coffee or two before setting off, but no carbs – this has been shown to be a good way to shock your body into using your fat stores more effectively.  If you intend doing a fasted ride, take some food with you just in case you need it.
During Rides.  So having had a hearty breakfast what should you expect to be able to eat whilst riding/training.  Again, it depends. On long endurance rides where you will be in the saddle for several hours, pretty much anything goes as along as you match your carb intake too your level of exercise (the amount you burn). There are many variables such as lean muscle and fat mass, metabolic efficiency and environmental factors, but the typical person can tolerate approximately about 60grams of glucose or 90grams of fructose per hour.  An energy gel is 21-26 grams per sachet (or approx 100 calories), so when you read take 3 per hour, that’s 300 calories you are consuming per hour and you maximum intake the average person can cope with. so you’d better be burning a lot of calories and be able to cope with a high carb intake…which is why I hear so many seasoned cyclists limiting their use to be being the “emergency gel”, to be used only as a last resort if you run out of steam before the end of a ride (it’s called ‘bonking’, or “the man with the hammer visits you”).
On a long ride I will typically take a bag of almonds, some cereal/muesli bars and bananas (not only a good source of natural carbs, but a great source of potassium that your muscles  and digestive system need during exercise).  At stops I’ll try to find a flapjack or granola bar rather than cake, or if you are on a budget, take a tuna sandwich with you, or homemade flapjacks – and consider that gels and bars are there for convenience, but at a cost.  If it is warm, remember to eat sources of salt, crisps, salted nuts, etc.
Also remember that you need to drink water, preferably with zero calorie electrolytes.  I have stopped using energy powders in my water as these can quickly and unthinkingly  push you over your hourly carb intake.  I usually consume about a litre every hour (more in the summer), not only keeping me well hydrated, but also improving my feeling of well being and lack of grumpiness.  A good study on hydration can be found here.
If the ride requires a lot of long hill climbing then I take a bag or two of Jelly Babies or Rowntrees Randoms – both small but effective doses of quick release energy, and more calcium gram for gram than milk 🙂    If you like the idea of sweets, but prefer a natural product, I can recommend guava energy bars as an easily digestible alternative – though not cheap.
On short ride, I will just take a banana and perhaps an energy bar as an emergency backup. There is a line of thought that if you are riding for less than two hours then you shouldn’t eat during the ride, including that mid-ride cake…but I’m sorry that goes out of the window if it is a “Sunday Social” ride of course !
I have been deliberately non-prescriptive in the amounts you can eat because how much or little you consume is so dependent on the factors already described, so is a bit hit and miss; however as a guide, look at how many calories you are burning during an exercise.  As an example I’m 55 years old and weigh 75Kg, and typically burn approx 500 calories an hour.  My maximum burn was 3,500 calories on a ride over 100 miles with 2,800 metres of climbing, so I could afford a few pork pies that day, but when I started I burnt only 250-300 calories an hour as I was on beta blockers and hence couldn’t exercise intensely. So don’t worry if you are a little heavier than you want to be, perhaps you are just starting out on your journey to fitness, then you may be burning 600 or 700 calories per hour on intense rides, unless you are on medication.  Use Strava or TrainingPeaks or whatever App you use to work out what you are burning, and try to eat well, but less than what you burn….let’s keep the maths simple.  In essence, if you are looking to lose a little weight by cycling, then an hour’s ride may not mean that you can indulge yourself.   As a guideline, a slice of pizza can be approximately 400 calories and a couple of beers approximately 160 calories a pint!, so it is quite easy to undo all that hard work.
After a ride I advise taking a protein drink or bar within 20 minutes of finishing.   This is important as our bodies will begin to repair itself from the strain you placed it in during the exercise (which is also why rest between exercise is so essential) and if there is no fuel in your body it will take energy from your muscular glycogen stores (which take a long time to replenish), so it is important to give your body a good dose of protein to use instead. If you enjoy milk, go for that, otherwise there are plentiful choices of post-exercise protein drinks and bars you can get from your local bike shop or on-line.
So eat normally, keep to unprocessed, natural foods and take solace from the fact that each time you cycle you are training your gut to be able to cope better with carbs, and if you are not replacing the calories burned with little (or not so little) treats….then you will see a drop in weight, a greater tolerance to processed carbohydrates and improved metabolism with regard to handling sugars.
Eat well and enjoy your cycling !

Cycle Training Apps – Overview and “How To” videos

When it comes to Cycle Training Apps, there are two types of App:

  1. The first can be used for both road cycling and indoor training.  Examples are Strava and TrainingPeaks
  2. The second type are pure indoor Apps.  Examples are Zwift,  Trainerroad and Sufferfest.

Let’s look at using these in turn.


Strava is the default App to have.  There is a saying in the running and cycling community, which some people take seriously, that “if it isn’t on Strava, it didn’t happen”. It is one of those Apps where you will quickly become hooked!

Once you have a Strava account (the basic account is free), download the Strava App to your phone and start/record rides (indoor and road).  If you have a cycling computer, connect your Strava account to your Garmin Connect account or Wahoo Elemnt account so that you can upload your rides from your cycling computer directly into Strava.

Strava is primarily for the road, but can also be useful to capture your indoor workouts. It comes with training plans, but is not really designed to be used for structured workouts per se, it is designed to record your ride or other activity.

Once you start to use Strava, you can review your workout data, compare with previous workouts, or connect with one of the tens of millions of people using Strava, including Strava friends, and compare your performances for fun, or as friendly rivalry.


TrainingPeaks is a App for people who want to train seriously either by themselves or in collaboration with a coach (which is why I use it for my coaching business https://www.cycleforfitness.com).  Once a training plan is created or “loaded” into your profile, the workout is sync’d to your cycle computer for you to follow ether on the road or on the indoor trainer.  After your workout the data is uploaded for you to review (by yourself or with a coach).

Plans can be based on your rate of perceived effort (RPE) or according to heart rate, cadence and/or power zones.   A premium version exists for £11 per month if you want to get access to more data statistics.

If you use Trainingpeaks, I  recommend that you connect it to your Strava account, and your Garmin or Wahoo accounts to enable syncing.

Notes:

  1. RPE based workouts do not sync to Garmin devices, you need to drag and drop the workout file directly on the device.
  2. For Wahoo devices, make sure you sync using the companion Elemnt App to get the planned workouts onto the device, and uploaded after the event.
  3. For basic accounts, you can only sync that day’s workout onto devices, whereas with premium you can sync the entire week’s workouts.


Zwift is one of the fastest growing indoor training Apps that allows you to enter immersive virtual worlds and “ride” with thousands of people in real-time from all over the world. You can join team rides, ride for fun, or follow structured workouts.

An advantage that Zwift provides when working with basic trainers is that it can calculate ‘vPower’ (virtual power), basing its calculation on your age, weight, cadence and heart rate.  This calculation results in a measurement called Watts/Kg, which it uses to calculate your moving speed in the virtual world. Trust me, it works really well.

When starting out, you may only have say 1 or 2 Watt/Kg over a 5 minute interval a so you’ll be going slow, but as you build fitness and strength, or lose weight this will increase to 3 or more Watts/Kg over the same period. To give you an indication (but not to dishearten you, a professional usually cranks out 6 to 7 Watts/Kg !).

I like Zwift purely for the entertainment it provides, it is truly immersive and the time seems to go faster than watching a blank wall or TV programme. Pricing has jumped to £12 a month for new accounts, which some people might consider steep if you are also subscribing to other indoor training services.

It may seem a little daunting on how to setup and use Zwift, so please refer to the below videos on setting up Zwift, selecting structured workouts (from TrainingPeaks), riding in its virtual world and using ERG to train to target power levels.

Setting up and using Zwift

Selecting workouts, or make you own !

Using Zwift with ERG


Trainerroad is an indoor training App for whose who want to train using coach developed workouts (in a similar fashion to TrainingPeaks but without the bespoke coach support).  It is a competitor to Zwift.  On the upside, it has better planned workouts, but does not have the same immersive feel as Zwift.   Trainerroad can also calculate vPower using your basic trainer’s power curve characteristics,etc, so you will get a good workout with the basic trainer.  You can connect sensors using Trainerroads setup screens.  When I used Trainerroad it all worked well.  In terms of pricing they do not offer a free account, it’s $12 a month.

Traineroad requires a little setting up,but is reasonably straightforward.   The following videos show how to get your TrainingPeaks workout into Trainerroad and your user experience.

Loading Workouts and using with Video

Setting up and working out with Trainerroad


The Sufferfest indoor training App sits between Zwift and Trainerroad, offering training plans and real life videos that you can follow as if you are riding with the peloton.  It’s style is that cycle training is all about the degree of suffering…you may love or hate the machoism in the names of rides  such as “the hammer” , “hell hath no fury” ..for the novice it might be daunting, or fun, you take your choice.

Where and when to use

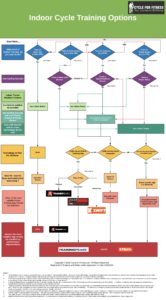
I’ll refer you to my other article on indoor training for you to decide and as a taster, below is a decision tree intended to help you make your choice.


Indoor Cycle Training – the low down

Summary

Let’s get to the point, training indoors rather than being out riding is boring but useful, and primarily for times when you cannot get out to ride.  In term of budget, you can start with a low cost basic trainer and mount your bike onto it and off you go.   If you want to go beyond training using your own perceived levels of effort, get a heart rate monitor (Bluetooth is easiest) and connect it with your phone or laptop.   That way you can train using Apps such as Strava or Trainingpeaks to make your workouts effective.

If your budget allows, and what you want to measure as part of workout increases (see below pie chart), connect Speed/Cadence sensors and by upgrading your trainer to a smart (or connected) trainer that that either measures or simulates your power output, you will be able interact with Apps such as Trainrroad or Sufferfest or use immersive Apps such as  Zwift.

In terms of budget, you can spend from £150 to £2,000.   The biggest outlay will be the trainer itself, followed by sensors and then there is a wide choice of free and monthly subscription based Apps.  The decision tree to the right is intended to help you make those choices.   A larger image is on my Pinterest board here.

Why Use Indoor Trainers

In the previous article I wrote and video’d how to set up Garmin and Wahoo cycle computers to talk to various sensors that you need if you are considering training, such as heart rate monitors, and cadence/speed sensors.

We will also talk here about measuring power using an indoor trainers as they more readily available and cheaper than the eye-wateringly expensive power meters that are used for road cycling.

So why would you want to measure these things in the first place ? When riding your bike on the road, I agree, these are nice to haves and you can train by using your own levels of fitness as indicators of how far and how hard to push yourself. You’ll recall this is called training to your perceived rate of effort (RPE) and is used to get us started and riding up to for example 20 miles in one go without having to stop.
However, if you plan to go that one step further and use cycling as your primary means to regain fitness to a level where you could easily ride one of the many sportives, charity rides, or cycle with club riders, then by measuring your heart rate, cadence (pedal speed) and possibly power, you can train much more effectively to a specific and measurable plan.

When it comes to indoor trainers, measuring your heart rate, together with speed and cadence becomes necessary if you want the best out of your training workout.

But you may ask, don’t we just swing a leg over the bike, and pedal for a while, looking at a blank wall in the garage, shouting at Jeremy Kyle, or watching our favourite boxset ? 🙂 Nice thought, but time and again I hear that indoor workouts are boring, and because you cannot manage what they cannot measure, or if you don’t feel that all that sweating is making a real difference, it is way too easy to become seriously demotivated.

Okay,  if it is that boring, why bother with indoor training? The answer is that the vast majority of people who use indoor trainers, while considering this form of exercise a necessary evil, know that it helps them keep fit when the weather outside is not amenable, or just too dangerous due to ice, snow, floods, etc.   Other reasons for indoor training is that you may consider the roads around you are dangerous, being full of cars, vans and lorry drivers who are “out to get you”.  Or perhaps you simply haven’t yet gained the confidence to ride on the roads as you have been unwell, seriously unfit or injured and the roads just seem too daunting at this time of the year.

Either way, over the last few years a new arm of the cycling industry has popped up to help you with new Apps and advanced (or smart) indoor cycling trainers,  aiming to give you immersive entertainment, and offering you the chance to have fun, realistic and effective workouts. By capturing certain data, this new industry help you understand how your performance is improving and help you avoid having to swear at Jeremy Kyle !

Types of Indoor Cycle Trainer

Having bit the bullet and decided that you want to exercise using an indoor cycle trainer, where do you start ? It very much depends on a couple of things. The first is your budget, the second what you want to achieve and how realistic you want the indoor trainer to be to road cycling. Cycling Weekly  has a reasonable guide to turbo trainers, however my take is below.

Basic Trainers

If your budget is conservative, then you’ll probably be looking to get a basic trainer (from £150 to £450). This is the type where you mount your bike onto a frame, with the rear wheel pressed against a roller with either a fixed or varying resistance created either by magnets, a fan, or fluid-filled resistance unit.  The good points about basic trainers are that they give you the ability to do and free workout or according to a structured plan.  However there are two downsides;

(a) you cannot use them with Apps such as Trainerroad unless the trainer is vPower compatible, and you also have a speed/cadence sensor for Zwift.

(b) you cannot control the resistance, so you have to either increase the cadence or drop to a higher gears to increase power and vice versa.

Note that if you have a power meter for you bike, you can use them with the basic trainer as if you road riding, pairing the power meter to  your cycle computer or via laptop/phone to one of the above cycle training Apps (we come to those later in this article).

Smart Trainers

Moving up the scale in terms of sophistication, features and hence cost, we come to smart trainers. There are two types:

  • Wheel Drive

The first type if similar in operation to the basic trainer, the difference being that the resistance can be controlled and varied from your cycle computer, or more likely nowadays, cycling training Apps.

  • Direct Drive

The second type, and usually top of the range, are the ‘direct drive’ trainers. These work by removing the back wheel and mounting the bike directly on the trainer. The resistance can be set by cycle computers and cycle training Apps  and can simulate the feel and an create an immersive riding experience….all at a price !

Rollers

For completeness, we need to mention rollers. Rather than mounting your bike on a frame, the bike sits on a set of two rollers at the rear and a single (connected) roller on the front. As you pedal the rollers rotate, just like a rolling road that an MOT garage users to test your car, mimicking cycling on in real life and yes the acronym IRL (in real life) is used by the indoor trainer community.  One last point,  rollers are not for the faint hearted novice as they require you to have solid core strength and ability to concentrate.

Trainer Tips

  1. If you buy the type of trainer which requires you to keep your back wheel on and mount the bike onto a frame, it is essential that you use the skewer that comes with the trainer, do not use your existing skewer, if that snaps when training, it’s going to hurt…or more seriously you may injure yourself.
  2. Use a “riser” or similar to raise the level of the from wheel to match the back wheel, otherwise the bike will be tilted down at the front, placing strain on your hands, arms and shoulders.
  3. If you intend using a roller, try placing it next to a wall so that you have somewhere to touch or grab if you use your balance.

Training using Power Zones

We have mentioned that we can capture how much power you are putting through the pedals using trainers that support vPower, and this can be useful if you are training to power zones.   More accurate measurements can be taken by using your existing cycle’s power meters or upgrading to a a smart trainer that measures power as part of its feature set.

This use of power becomes a core feature as you progress your fitness levels and has many athlete level training programmes concentrate on workouts that are based on your functional threshold power – or the maximum power that you can sustain over a 60 minute period, limited by strength, aerobic fitness and your body’s ability to manage the build up of lactic acid in your muscles that create the pain and cramps you feel when undertaking strenuous exercise.

When training using power thresholds on an indoor trainer it is important that you can match your power to the training plan you are following, whether that is a set resistance or the gradient of the road that you are following in one of the interactive/immersive Apps (e.g.  Zwift).    To help the industry developed a smart trainer mode called  ‘ERG’.  At first I wasn’t that excited about it, but it is now a cornerstone of my training. Here’s why.

Controlling your Trainer with ERG

This mode enables you to set a particular target power level for your workout and the trainer will set the resistance such that you pedal out this power level irrespective of your cadence. This allows you to do a workout with for example short intervals at high intensity, where all you need to is pedal at the same rate and the trainer will adjust the resistance automatically so that you achieve the required power output without having to mess about with your own gears.  My Zwift user experience video shows this in action.

Connecting Indoor Cycle Trainers to Gadgets that measure your efforts

Once you have chosen your indoor trainer, we need to set up the various meters and sensors so that we can train to a plan, and afterwards make sense of our efforts.

Of course life wouldn’t be the same without technology complications. If you read my blog on connecting cycling computers to sensors you will remember that there are two technologies that allow stuff to talk to each other. One is ANT+ (owned by Garmin) and the other Bluetooth (mainstreamed by laptops, smartphones, etc). Most cycling computers will talk to cycle sensors using both technologies, but before you buy, check that they are compatible.

If you want your laptop to connect to the sensors, this is straightforward if the sensors are Bluetooth, however if they are ANT+, you’ll need a USB dongle that you plug into the computer so that you can talk to the sensors using ANT+.

If you want to connect ANT+ sensors to your phone or tablet, then this is also possible. For Android your phone may already be ANT+ enabled. If you are using iPhone/iPad, then you’ll need to buy an ANT+ accessory. See here for more information.

Once we are connected we not finished. To get an immersive experience, connect your laptop or phone/tablet to a TV placed infront of your bike. Use a high quality HDMI cable if possible. Another option is to use an Apple TV and stream from your phone, tablet or macbook to the TV via the Apple TV.


If in doubt, feel free to ask me – grant@cycleforfitness.com


Cycle Training Apps

Once we have worked out which indoor trainer to use, and connected them to sensors, if we want to follow a training plan, we need to consider if we’d like to use one or more of the various cycle training Apps.

As a starting point, create a Strava account and download the App to your smartphone. As long as you have as a minimum a heart rate monitor and speed/cadence sensor that you can do a workout on the indoor training pretty much the same as on the road.

From then on, the choices become a little complex, but let me try to simplify :

  • If you would like to have a training plan with structured workouts then all the Apps offer training plans, some better than other, in my opinion in the order of  functionality:
    • TrainingPeaks (preferred due to (a) the comprehensiveness of the plans, (b) ability to be used with or without a coach and (c) can be used on both road and indoors)
    • Trainerroad
    • Sufferfest
    • Zwift
  • If you plan to use training plans when you are riding your bike on the road, then TrainingPeaks is the only way to go as it does both road and indoor.
  • If an immersive experience (entertainment) is more important than the quality of the plans, then create the workout in Trainingpeaks and use Zwift (fun) or Sufferfest (more hardcore) for the workout.

Now here’s a thing, if you want the best of all worlds, you can get free accounts with Strava and TrainingPeaks and then buy Zwift (£12 per month) and use your TrainingPeaks workouts in Zwift for a serious, but entertaining workout.  If you wish to are a data freak, or want to use a coach, buy a premium TrainingPeaks account (£11 per month).  Rather than discuss each training App in this article (let’s Face it, it’s long enough!), I have created a separate article with a series of videos that show you how to use a structured workout from an App (in this instance Trainingpeaks) and use your indoor trainer with two of the most common indoor training Apps, namely Trainerroad and Zwift.

Putting it all together – the options

The good news is that once you’ve sorted out the connections, you can use both the basic and smart trainers with your cycling computer or favourite training Apps.  Let’s look at the options:

  1. Cycling Computer with Basic Trainer. With this setup you mimic road riding. As the trainer has a set resistance, you use your gears in the same way as you would ride up an incline, choosing lower gears if you want to spin your legs, or a high gear if you want to grind it (not recommended). If you use your heart rate monitor, speed and cadence sensors, this will be picked up by the cycling computer so that you can train to a particular speed, cadence or heart rate, then upload these to your favourite cycling App (Strava or TrainingPeaks for example).
  2. Cycling Computer with Smart Trainer. These trainers allow you to control the resistance from your cycle computer. You’ll need first of all to load your workout onto the device from for example trainingpeaks.com or created a structured workout on the device itself. Before you buy, check that the cycling computer will connect to your sensors – the vast majority are compatible, but I have found that some devices (not to pick on them, but for example the Wahoo Elemnt) will not talk to some power meters even if they both use Bluetooth. I recently had that problem with a Bolt and Kinetic Smart trainer, meaning we had to resort to using option 3 (below) to capture power. This wasn’t a problem as we were able to merge the files from the cycling computer and the Kinetic.Fit App once they were upload to TrainingPeaks, so no big deal in the end.
  3. Cycle Training Apps with Smart Trainer.  If you want to get more out of a basic trainer, buy one that support “vPower”. When used with indoor Apps such as Trainerroad and Zwift, the Apps can calculate your virtual power (vPower) and hence can be used with power-based workouts and simulate your road speed in their virtual worlds. Sounds geeky, but is a highly entertaining experience.
  4. Smart Trainers’ own Smartphone/Tablet Apps. Companies such as Tacx, Wahoo, Kurt Kinetic and others provide “companion” Apps (iPhone, iPad or Android) that connect your trainer and sensors to your smartphone/tablet enabling you to run workouts using those devices rather than a cycling computer. These Apps can also be used to create structured workouts, but you may need yet another subscription, so I’d only recommend as a last resort and would suggest using one of the Cycling Training Apps as discussed below.


Conclusion

In conclusion:

  1. For indoor trainers, open a Strava account, then get the smartphone App and use with a HR and speed/cadence as a minimum.
  2. Choose a sturdy indoor trainer, preferably one that supports vPower to future proof your investment.
  3. Get a TrainingPeaks account (or Trainerroad) and link that to Strava so you can start to train to a plan. If you need entertainment to keep motivated, buy a monthly Zwift subscription…or Sufferfest if you want something more realistic and hardcore.
  4. As a next step up the ladder of complexity, but really a nice to have, instead of buying a basic indoor trainer, spend the extra few pounds and get a smart indoor trainer so that your training rides can simulate riding outdoors and you can train according to power zones.
  5. As for cycling computers, they can be used with your indoor trainer, but check the model and the indoor trainer you plan to buy are compatible, ie Bluetooth, ANT+ or both.

Still confused, then get in touch and I’ll walk you through your options based on how you plan to regain fitness and wellbeing.


Connecting ‘Computery’ Bits and Pieces

Overcoming Trouble with Cycle Computer Technology

One of the most frustrating things on earth is to try to get technology working as you’ve been told, the manuals and quick start guides lull you into a false sense of security such that when things don’t go as expected, you are lost, hopelessly asking friends, perhaps “googling” it online or haing to trapse back to the shop that you bought the various cycling computers and sensors from….assuming you didn’t get all the bits and pieces online…and hence “up the swanny” Sound familiar ?

Well this happens to me more than it reasonably ought. One of the likely but perhaps untold aspects of helping people with their cycle training regimes is that you become their default technology helpdesk, working out just why this bit won’t work with that bit, when the manual says otherwise. Thankfully I have worked with all types of technology over the last 35 years, and always love a challenge, putting my mind to solving problems.  So, based on what I have learnt so far about cycle computers and sensors, I’d like to share some of my experiences of setting up the common cycling computer technology for road cycling (the complexities of setting up indoor turbo training will follow).

What type of device to get

Until recently the biggest decision was which Garmin “Edge” cycling computer to buy (25, 520, 820 or 1000) depending on whether you want a touchscreen and wheter you need a computer for navigation. Once that decision was made, it was a natural extension to purchase Garmins’ cadence/speed sensors and heart rate sensor. All of Garmin’s devices use the ANT+ as the means that you can pair the sensors very simply from the computer and then they will talk to each other, and as long as the batteries are charged then to be frank, it’s a doddle to setup.

Hot on the heels of Garmin, the new kid on the block, is the Wahoo Elemnt and Elemnt Bolt. If you dont want touchscreen and colour displays, they are very competitively priced alternatives. Apart from price, another differentiator is that the Wahoo devices use Bluetooth as well as ANT+, meaning that they can talk more easily with smartphones, computers, and hence give you more choice in terms of the sensors that you can connect.

Ease of Setup

In terms of setup, both Garmin’s Edge devices and the Wahoo Elemnt/Bolt, are reasonably straightforward, with two small caveats for the Wahoo. The first is that you need to download the Wahoo “companion” App – and make sure you download the Wahoo Elemnt App and not the Wahoo Fitness App. A second is a gotcha in that need to connect to your home wifi network (needs to be 2.4GHz network on channels 1 to 11) as the configuration is done on the App then downloaded to the device. Once that is done, and you’ve downloaded any software updates you are ready to go.

For both the Garmin and the Wahoo, you’ll need to create an online account so that your workouts can be uploaded and stored online . By connecting to the commmonly used sites such as Strava, MapMyRide, etc you become a part of the wider (global) cycling community and can very easily start to interact with people, share your experiences and monitor your progress, whether that it average speed of a ride, total miles/kilometres ridden per week/month, compare rides with friends. etc.

If you want to ride according to a training plan, both Garmin and Wahoo allow you to download and follow a structured workout plan using the device to prompt you whe for example you need to increase or decrease your efforts. The Wahoo devices come with reloaded workouts from Team Sky or you can create your own. Similarly with the Garmin, you can create your own workouts on the website (connect.garmin.com) and sync these down to the Garmin device (using a USB cable or wi-fi, depending on the model). If you sign up to TrainingPeaks for example, you can create your structured workouts (including annual training plans), or have a coach do that for you, and sync these to either the Wahoo or Garmin (though Wahoo is easier to sync that the Garmin).

Connecting Sensors

Now comes the interesting part.

Garmin.

When you turn on the Garmin it first of all looks for satellites, but you can ignore that if you wish.  For the Garmin Edge 520/820 you’ll need to select Tools (they use a little screwdriver/spanner icon) and select Bike Profiles.

Add your bike, then select Search All to find your sensors.  Here’s the difficult bit.  You need to wake up the sensors for them to be found.  For the HR sensor you need to be wearing it, for the Cadence sensor you need to  rotate the crank and yes you guessed, for the Speed sensor rotate the wheel.     It is best to do this when you are away from other bikes that have sensors, as you may pick them up instead of yours.      With the Edge 1000, Garmin has done away with bike profiles, so you simply need to select the Tools icon and then select Sensors.


As before you need to wake up your sensors, then you can select them one at a time and press ‘Connect’.

The device will remember the sensors, however will disconnect if the sensors runs low on battery power.    For the Edge 1000 you will also need to  press”Enable” to get the sensor to work.     Note that Edge devices do not connect to Bluetooth sensors, with the exception that they will connect to a smartphone using Bluetooth.

  1. Watch  here for how to connect the Garmin Edge 820
  2. Watch  here for how to connect the Garmin Edge 1000

Wahoo Elemnt/Bolt.

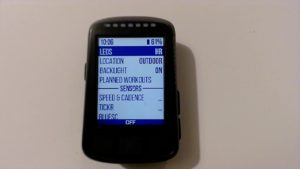
These devices can connect to both Bluetooth and ANT+.  You can add Bluetooth sensors (however as with Garmin, you need to wake up the sensor first)  by selecting Menu then Add Sensor, hold the sensor near the devices and it should detect it.   There is an extra step for ANT+ in that you need to select ‘Add Sensor’ then ‘More’ to find the type of ANT+ device that you want to connect.

Alternatively use the Wahoo Elemnt App (they call it the companion App) and select Add Sensor on your smartphone.   Make sure you save the device so that it recognises it next time.     Note that if you have installed the Wahoo Speed/Cadence meter, depending on model, you may need to remove the pedal to slip the cadence sensor onto the crank.    Once installed, make sure that the sensors are placed such that they are close enough to both the crank and the wheel magnet to get a good pickup.


  1. Watch here for how to connect the Wahoo Elemnt/Bolt

If you want to use the computer while training on a turbo there are a few other considerations, trials and tribuations that I will explain in the next episode…

You Can’t Manage What You Can’t Measure

An axiom or “truth” if you like that I learnt from nearly 40 years in corporate life is that you cannot manage what you cannot measure. Although this comes from business, it is equally true for all types of training, and with the price of cycling computers and sensors plummeting in recent years, it is now possible to record your training sessions without breaking the bank.

However, the benefits of cycling computers (beyond being used for navigation) are only realised once you begin to train to improve fitness or to prepare for a particular event such as a charity ride, or sportive that you foolishly signed up to with your friends without knowing what you were letting yourself in for 🙂

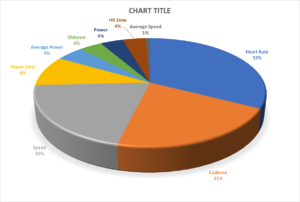
I recently did a survey with a friendly group of 130 cyclists to try to understand what they measure when cycling. As you can see from the photo, by far the most common thing was heart rate (33%) , followed by cadence (21%) and speed (20%).

Let’s look at these in a little more detail.

Heart Rate

I have previously talked about training in your own personal “sweetspot”, ie sufficinet hard enough to make a difference, but not too strenous where you are likely to cause yourself an injury. Once you know where your sweetspot is, it is therefore possible to devise a plan such that you ride according to your particular heart rate “zones”. In essence, using your heart rate ensures you get the best session possible for you – if you’re going to sweat, make it worthwhile !

Cadence

I have also talked about the importance of maintaining a good pedalling speed (cadence) such that you are creating the right balance between spinning (giving you a cardiovascular workout) and grinding (a muscular workout), so by having a cadence meter you are able to monitor the speed at which you are pedaling and recognise if you are pedalling too fast..or more likely that you are slowing down as you tire, and therefore in both instances need to use the gears more effectively to correct the cadence back up to your optimum. Cadence can therefore help prevent stress injuries and keep you in the optimum pedalling zone.

Speed

Another benefit of a cycling computer is recording how fast you have been riding. While knowing how fast you are going at the time is particularly attractive if you are slightly competitive, seeing your average speed increasing from say 10mph to 18mph as you get fitter, is very rewarding and allows you to gauge how you compare with other riders. For example if you wanted to ride in a group or club, they usually say what the ride’s average speed will be, so you can choose which group to ride in, comfortable in the knowledge that you can keep up and hence have a much more enjoyable time than if you were battling at the back of the group.

So, if you are struggling to justify getting a computer, I hope the above gives you additional insights to the benefits. If you have recently bought a cycling computer but don’t know how it can help you beyond navigation, I hope this gives you a little more confidence to start to use it more effectively. Either way, feel free to contact me (www.cycleforfitness.com) if you need a little more advice.

In the next blog I will talk about the trials and tribulations of geting cycling computers and sensors talking to each other. Until then, safe riding.

cheers, Grant@cycleforfitness.com

The beautiful curve

Or, simply put, does training work, and what does success look like?

As Christmas approaches, we begin to turn our attention to our annual new year’s resolutions.  Many of us consider taking up exercise to get fitter and healthier for 2018 after the Christmas and other over indulgences.  However, by mid-January reality begins to kick in.  We start with good intentions, but soon become disillusioned by lack of tangible progress, or over-train to the point of exhaustion or injury.

So, you think, okay this time I will exercise according to a plan, excited by the abundance of ‘free’ cycle training plans that you find for example on the Internet, each proclaiming “fitness in 30 days”.  However attractive these plans are, they are of little value to the average person, unless your goals, fitness and time availability exactly match the plan, you are likely to be over or under-trained.   It is unlikely that you will train specifically for your goals, assuming you have thought through what you want to achieve beyond “I want to be fitter, healthier and slimmer”.  In these circumstances, it is difficult to have the self-determination to keep motivated.   We’ve all been there.

One reason that most of these plans fail is that they do not take into consideration your age, level of current fitness, what motivates you or that you might be just at the starting point with your cycling, and not sure of how long and how far to go; what to wear, how to avoid common pitfalls, etc.

So, let’s explore what we need to consider to get the best of every workout session, maximizing our precious free time – after all, exercise is tough, so it makes sense to get the maximum benefit from it.

There are three primary ways to measure our training effort:

  1. Rate of Perceived Effort (RPE). This is the simplest form and is what www.cycleforfitness.com uses for our beginner plans, or those people who have yet to invest in a heart rate monitor. The RPE plans are based on 10 levels:
  • (1 to 2) active recovery/easy endurance (we can hold a conversation and ride without getting out of breath),
  • (3 to 4) aerobic endurance (we can talk with some breaths in between sentences, and could keep this pace for the entire workout)
  • (5 to 6), harder tempo (we can speak, but need to take breaths in-between, but could not hold this pace for the entire workout)
  • (7 to 8), development speed (able to speak one word at a time between breathing)
  • (9 to 10), maximal effort and climbing (don’t even think of speaking to me).
  1. Heart Rate Zones (HR Zones). As we move towards more advanced training, we need to establish our heart rate threshold (you need a heart rate monitor and  our heart rate calculator) and use this to create heart rate zones. As you become fitter you will be able to stay closer to your maximum heart rate for longer, enabling you to train harder to get better results.
  2. Power Zones. Similar in concept to HR Zones, power zones are more sophisticated, require a power meter and need to be based on a threshold called “Functional Threshold Power” (FTP). This can be estimated by riding as hard as you can for 20 minutes. A value of 95% of the average power over the 20 minutes is used to give you your baseline FTP, which will then define your power zones.   As you get fitter your FTP will increase and hence you power zones will change over time allowing you to monitor and train according to your threshold.

So how do our plans work?   We look at three indicators when creating the workouts:

  1. Training Stress Score (TSS) – a measure of the hardness of your workout. We increase the TSS progressively to ensure your work rate increases over time.
  2. Chronic Training Level (CTL) – this indicates your level of fitness. We aim to increase this progressively with each workout, using the training sweet-spot we discussed above.
  3. The Acute Training Level (ATL) – indicates your level of fatigue and is used to determine how much recovery time you need between sessions. We calculate the expected, however the actual ATL will require you to use a heart rate monitor, and power meter for accurate measurements.

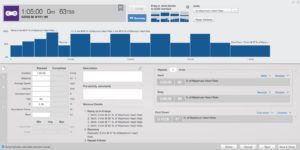
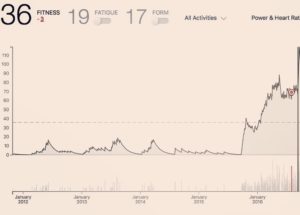
By putting these together, if you are using a heart rate monitor (and preferably power meter) we can calculate your expected performance at any given time.   This is known as the Training Stress Balance (TSB), simply calculated as your fitness (CTL) minus your fatigue (ATL).   This indicates your ability to perform or simply called your “form” (you hear this a lot when pundits talk about athletes or racehorses).  Here’s an example of one of our heart rate based workouts.

Each time you train your fitness (CTL) increases, however your level of fatigue (ATL) also increases, generally at a faster rate.  It’s okay over a short period, but does mean your form (TSB) is decreasing. The good news is that when we rest between sessions the fatigue drops away faster than fitness, meaning our ‘form’ improves. Therefore, athletes training for an event, will look to “come into form” or “peak” at just the right time i.e. greatest possible form on the day of the event.

By follow our training principle, we can plan and show your progression. I like to call this the beautiful curve, and as an example my curve is shown below.

What is interesting is that although I had been riding for several years, and had some peaks in performance each summer, it wasn’t until I started working using this strategy that it really made a difference, and you can see this very clearly.

The first surge was to help me ride 500Km around Mallorca, the next surge made me fit enough to ride and enjoy the Ride Across Britain (969 miles in 9 days).   All I can say is that from personal experience, it works!

So, if you have been struggling to become fitter or want to start out using a proven technique, where every training session will have a positive and sustainable impact, get in touch, select one of our packages or pick up the phone (07525765883) and we can discuss how we can help you start your journey to fitness and well-being.

You bring the resolve, we bring the results..

When it gets frosty….

The easiest thing to do is to stare out of the window and put off the ride that you have looked forward to until another day.  But  you remind your inner self that you have committed to improve your fitness, and it really is down to you; fitness and the sense of true well-being don’t just appear by watching Saturday Kitchen, for some perhaps, but that’s a guilty pleasure 🙂
So you pace around the house like a caged cat, knowing you want to ride, knowing you should ride, but how can it be possible when it looks so blinking freezing outside ?  I’m not going to advocate that you just “man up” or apply Rule #5 (which is “Harden the ‘f@!k’ up”). That type of advice doesn’t help if by the end of the ride you are frozen to the core, and that self defeating belief that it wasn’t a good idea will just have been reinforced.
So how to get out there without buying eye-watering (and wallet depleting) amounts of cold weather kit ?  Here are a few of my favourite tips for staying warm on a budget.
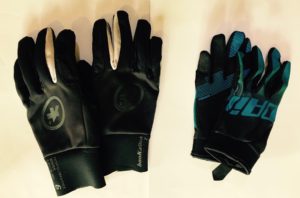
Hands.  There are many makes of gloves, some marketed as being for below 10 degrees, others down to freezing point, where do you start ?  A simple solution is to buy a good quality pair of long fingered gloves, make sure that they fit you, and make sure you can reach the brakes and change gears while wearing them.  In terms of price, at the high end you’ll find gloves from the likes of Rapha at £70, right down to gloves from Aldi at £7.99.
Cheap is not always best, nor is expensive, so try out a few pairs, and you will find that there are good options in the £20-£30 price bracket.  Furthermore, rather than buying uber-expensive sub-zero gloves, buy a pair of silk gloves (for £5 on eBay) instead.  Silk has excellent heat retention properties (it is a non-conductor of heat similar to wool), acting as a liner when worn under your normal gloves when temperatures drop.
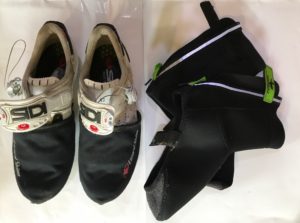
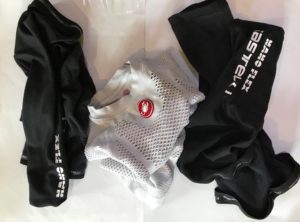
Feet.  The vast majority of cycling shoes have been designed primarily for warm, dry weather. You could invest in specialist winter cycling shoes (at a cost), or adopt what most cyclists do and get a pair of “over-shoes”.  Now, over-shoes are not designed to be 100% waterproof, but act as a very good wind barrier and will keep your feet reasonably dry and snug unless you get caught in a prolonged downpour. There are many versions, from the toe-cap type to the full shoe cover (see photo).
At this time of year I would suggest the full shoe cover as they will keep your shoes free from all the muck and grit that gets thrown up from the road.
Over-shoes do not need to break the bank, with good options being from the likes of Madison or SealSkinz; both around the £20-£25 price bracket. If you’d like some addtional comfort, buy a quality pair of merino wool socks (circa £7) or my favourite, the sealskinz waterproof socks, slightly more expensive, but if you value dry, warm feet then the investment is more than worthwhile.
Body. The secret is to use layers, and those in the know recommend three. The first layer is for moisture management (to wick sweat away from the body), the second layer for warmth, and the third for bad weather protection.
  1. The foundation is the base layer.  This can be a budget base from Aldi at £7 through to the Castelli base layer at £28, the important things to look for are to ensure that there are no seams that will rub and irritate you, and that the material wicks sweat away from your body to keep you dry.
  2. After the base layer you need warmth layer. For this you can wear your cycling jersey, either short sleeve or long sleeve, or choose a warmer option using materials such as merino wool or other material that is similarly fleeced. What you are looking to do with the warmth layer is to use clothing that traps air (air is one of the best thermal insulators) between the base and protection layers.
  3. The protection layer comes in contact with the outside world, so needs to be windproof and waterproof/water resistant. For this layer you have the option of wearing a gilet (a windstopper for the body) together with arm warmers (see below), or wear a jacket. Every year I am amazed by the huge leaps in development of cycle jackets that can be bought on a budget. You no longer have to spend over a £100 to get a decent jacket that will keep you dry and will not make you become a victim of the infamous “boil in the bag” experience. However, this is the piece of kit that is most essential to maintaining your comfort, so if there is any stretch in your budget, a good quality jacket that fits you is where you should spend it. Things to look for when buying a jacket include good quality zips, elasticated cuffs, the length at the back should cover and hence protect your bottom when you are on the bike, it should be a snug fit, not too loose, include reflective strips and pockets. It must be wind-proof (and shower-proof) and breathable. A good example is the B’TWIN 100 jacket priced at £30, though just to give you an idea of the price range, the high-end Castelli Reflex jacket will set you back £225.   So, for the beginner, I recommend you start at the B’TWIN end of the scale.
Arms/Legs.  At some point you will want to think about how to protect your arms and legs from the cold. Let’s ccnsider the legs first. The obvious way is to wear long legged bibs or tights, and this will be the option for most people. However, if you want to continue to wear your cycling shorts, or due to the UK’s changeable weather you cannot decide on shorts or leggings, you can complement your shorts with leg warmers. These are designed to be worn under the shorts from the mid-point of the thigh to the ankle. If you choose this route, then you have the versatility of removing them if the weather improves on the ride, or quickly putting them on if the weather is poor or deteriorates. In a similar vein, if you do not want to wear long sleeved jerseys or a jacket, combined with the base layer and gilet for protection, arm warmers are a good alternative. If in doubt, wear a long legged bib and a jacket as your protection layer.
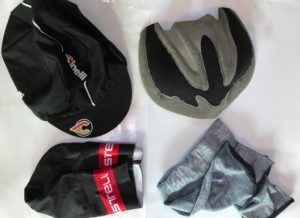
Head/Neck:  A good starting point is to wear a buff. This is a highly versatile peice of kit that can not only keep your neck warm, but also be used to cover your chin, protecting you from a biting wind. Castelli’s “head thing” is amazing as it can also transform into a skull cap and a balaclava ! if you want to use it just as a neck warmer, then I recommend wearing either a separate skull cap, balaclava or just wear a cycling cap.
It depends on how cold it is, how warm your head feels and how folically challenged you are. If on a budget, a simple buff (costing circa £10) and a cycling cap (another £10) will do most conditions in the UK.
So there you have it. For the budget conscious you can be fully kitted for £125 if you follow the above advice.

Preparing for Mechanical Issues – Part 3 (things that snap and twang)

Hello again !

So we have talked about what we need to take with us when we go for our midweek rides and how to manage repairing punctures.

However if you are planning a longer ride (e.g. several hours), that may take you to really remote locations where a phone signal may be a problem, or you just want to be truly self-sufficient, then we also need to include in our kit list items to cover those rare mechanical breakdowns.

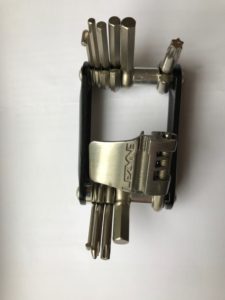
In this kit list we’ll need a set of tools, or one multi-tool that includes a screwdriver, chain splitter tool and allen/torx keys (see to the right), plus a spoke key and cable ties.

For long rides, such as multi-day tours, take spare spokes in your panniers and a spare hanger (see point 2 below).

Typically the type of breakdowns you might encounter include a snapped cable, a snapped chain, a broken spoke, jammed gears, etc. The list could go on, such as a jammed bottom bracket, but we are only going to cover common mechanical issues in this post, we don’t expect you to have to deal with situations such as befell this poor bike below:-)


Safety alert. If you do have a fall on the bike, once you are sure you are okay, please make sure you follow British Cycling’s comprehensive M-Check of your bike before you attempt to ride it again. Also if it’s raining or getting dark, choose your get out of jail card of phoning a friend or a taxi to take you home or to the nearest bike shop, so take your fully charged phone rather than tough it out, it isn’t worth the risk.


This primer therefore is aimed at those of you who’d like to be more self sufficient when minor inconveniences arise and we assume you have a working knowledge of bike mechanics in the first place; there are plenty of courses you can take, or please check out  YouTube for GCN as they do a good series of ‘how to’ roadside maintenance videos.

So let’s look at the common issues:

  1. Snapped Chain. So hopefully you have your chain tool and spare link. The process is pretty much straightforward, though I recommend that if you intend making this type of roadside repair then please please try it first at home to make sure you know how to remove the pins holding the broken link and know how to fit the new link and pins.  Also check that you have the right tool, there is a difference between 10 and 11 speed chains and Shimano/Campagnolo. As a tip, make sure the tool is square with the chain to avoid bending pins or breaking the tool.   Here’s a video from GCN on how.
  2. Snapped/Bent Hanger. This is the ‘sacrificial’ connection between the derailleur and the frame and is designed to snap or bend if the derailleur gets a knock. If slightly bent, then you can bend it back into shape sufficiently to get you home. If broken, and no spare, then as a last resort you need to remove the derailleur all together and remove a few links in the chain to make it into a single speed (use the inner chain ring and middle cog to keep the chain straight to avoid it skipping). GCN have a good video on converting to single speed.
  3. Jammed/Jumping Gears. If at the back, this can be due to a damaged hanger or derailleur, or the cable may be trapped. Check that the cable is free to move across the entire gear range, there may be some dirt or obstruction. If the cable is snapped or derailleur damaged, convert to a single speed. See above for how to do this.  If at the front, again check the cable runs freely, especially.
  4. Rubbing Brakes. If when you set off for a ride and your bike is in good maintenance order, ie in ‘fine fettle’, and you detect that the brakes are beginning to rub, start by checking that there isn’t any muck or obstruction stuck in the brake. Then check that the wheel isn’t buckled. Rotate the wheel to find where it is rubbing and check the spokes (they should all ping nicely, if one is broken or it is loose/broken then it will give you a dull ‘twang’).
  5. Broken Spoke. The main issue is that the wheel will buckle and place stress on the adjacent spokes. You may feel some instability and it is likely that the brakes will rub unless you are using disc brakes. If broken, strap it to the next spoke (use a cable tie if you have one), then using a spoke tool tighten the two spokes either side of the broken one and if needed loose the next two to straighten the wheel enough to get you home. GCN have a good video on the technique.
  6. Snapped Gear Cable. If the front gear cable snaps then it shouldn’t be too much of an issue as the chain will move over into the inner chain ring, no problem to get you home. If on the back, then try either one of these (1) move the chain up a few cogs and screw in the top limiter screw to keep the deraillieur from going into the lowest gear. This is okay if you don’t have too many hills between you and home, or (2) remove the gear cable from the lever and thread it back to the deraillieur. Move the deraillieur to a low gear and then hold it there by placing a knot in the cable. GCN show you how.
  7. Snapped Brake Cable. Try to avoid by regular checks and replacing any cable that looks kinked or worn. If you do find yourself out with a broken brake cable and you don’t have a replacement, then do not try to ride home with one brake – ever. Use your phone and get home safely.

I hope you enjoyed these few tips.

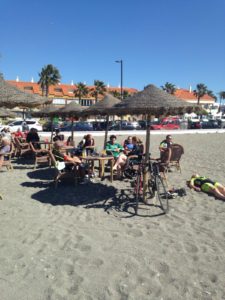
Enjoy your rides, remember that cycling is not always a beach, but sometimes it helps to be prepared when the worst happens.

Stay safe, Grant

Preparing For Mechanical Issues – Part 1 : What to Take

So you’ve decided to go for a ride, decided on what to wear (after checking the weather), checked the bike for anything untoward, put a little air in the tyres, and chosen your favourite jersey. Unless you have a plan you may muse a while deciding which route you’ll take based on time available, whether you need to train or if it is a social ride.

Right, you think you are ready. You clip in (assuming you use cleats), push off and get your mind set on enjoying a good ride. There may be a few lingering thoughts as you warm up, “do I have everything I need?”, “Am I prepared for a puncture”…there’s a faint possibility of there being other problems, but what could possibly go wrong, and how will I cope ?

Let’s face it, cyclists do need to be somewhat self-sufficient, but in my experience, if you are stopped by the side of the road, unless you are in a very isolated spot, another cyclist will at some point pass by, and if they are worth their salt, will ask if you are okay, and stop to help if you ask for it. In such situations, a quick thumbs-up is good enough to indicate that you’ve got this under control, while a quite British “excuse me sir/madam” should be enough to beckon them to your aid.

Before we go into detail of the types of problems, let’s take a moment to make sure we are prepared for most eventualities…and I am assuming you have checked your bike before you set off that it it in good condition, or as is called, “fine fettle”, the verb of which is “fettling”, google it 🙂

So what is essential to take with you, and what is nice to have. The below is my list based on experience, it may not be exhaustive, so feel free to give feedback on what you take if you like, this could make interesting reading.. p.s. goats and aqua-lungs do not count :—)

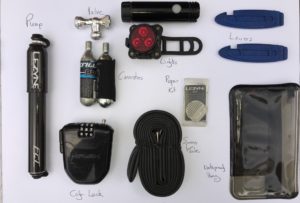
1. Essentials. Spare inner tube(s), fully charged rear light, a fully charged mobile phone (in a waterproof bag), tyre levers, pump, small multi-tool, water bottle/bidon(s), a couple of quid, light rain jacket. Optionally a GPS computer (only because I am a bit of a data freak, checking my heart rate, cadence, Strava segments, etc) or Smartphone running Strava, MapMyRide, etc.   Plus an ’emergency’ energy bar/gel, just in case !

2. Nice to haves. CO2 canisters/valves, front light (to be seen), chain splitter (in case you break the chain), tyre boot (a small piece of rubber that can be used if your tyre suffers a gash – a £5 note does the same trick), second backup mobile phone (an old Nokia-type phone with days of battery life is best), a little food such as a snack bar, banana, peanut-butter sandwich…anything to keep you going, and finally a map if you don’t have a GPS computer and don’t like getting lost.

To finish off the point on nice-to-haves, if you get one of those pay-as-you-go cheap phones as a backup, make sure you have programmed in your emergency phone numbers – I can remember one or two numbers off the top of my head, but as we rely so much on our smartphone, we rarely memorise phone numbers nowadays.

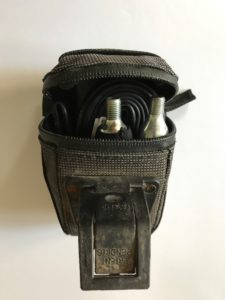
The above may seem like a lot of kit…however the total weight is less than 500grams, plus the tube, canisters, valve, repair kit and levers will all fit into your saddle bag.

Next time we will delve into the world of punctures, how you can minimise them happening to you, and tips for getting back on the road as quickly and painlessly as possible.

Happy Riding, Grant

Preparing for Mechanical Issues – Part 2: Punctures

So you’re now ready for your ride, decided on what to wear (after checking the weather), checked the bike for anything untoward, put a little air in the tyres, chosen your favourite jersey, and if you have read “Preparing for Mechanical Issues: Part 1” then you will have all you need to get you back on the road in the event of minor mechanical issues and breakdowns.

First up, and let’s face it, by a large margin of probability, if there is something that will go wrong, it’s going to be a puncture. So let’s concentrate on that for this primer.

There are plenty of videos and guides on how to repair a puncture, so I will instead look at how we can reduce our chances of it occurring.

There are a few types of puncture, ranging from the slow puncture, usually caused by a small sharp object piercing the tyre, a tear caused by you riding over sometime much larger, perhaps broken glass, or a “pinch puncture” caused by too low tyre pressure allowing the inner tube to poke between the tyre and the wheel rim and hence get “bitten”. In most instances these types of puncture are more of an annoyance rather than a danger to life and limb….I recall descending a steep hill somewhere in northern France, reaching speeds over 35mph, only to discover at the bottom of the hill that I had a managed to puncture the back tyre on the descent.  It might have been a little more dicey if it was the front wheel and at the same time we’d been descending an Alpine pass.

There are also the rare ‘blow out’ types of puncture, though that I have yet to experience one in 6 years of cycling and tens of thousands of miles traveled. If this was to occur, you will only hear a bang if the inner tube has somehow managed to squeeze out of the tyre, perhaps due to a failure of the tyre wall itself, or too a low pressure.  Another rare situation is sudden decompression caused by a rip in the inner tube or the tyre coming off the rim, but again rare if you maintain your tyres and follow the manufacturers’ instructions on tyre fitting.   Not to labour the point, but we can burst the tube if we put too much heat in the tyre by sustained and heavy braking, for example on long Alpine-type descents (not many in the UK.  Note that heat dissipation is not an issue if you are using disc brakes.

So can we eliminate punctures ? The short answer is no, but we can reduce their chances and make sure we are well prepared for the eventuality.  The main thing is to ensure our tyres are in good condition and we have a good quality inner tube. We also need to have the right tyre pressure in our tyres to avoid pinch punctures (see above).

Many people change their tyres in the Autumn for heavier “puncture resistant” tyres such as Continental’s Gatorskins.  Alternatively, and if you have the funds, you could, like the pros, go tubeless (the tyre is itself tube shaped and glued onto the rim, and due to lack of an inner tube are more resistant to punctures.  However, unless you are ready with a replacement wheel or use 2-way rims (to allow you to put on a conventional tyre/tube) then it can be a long walk home.

We can also help ourselves stay out of trouble by keeping out of the gutter and avoid riding over gravel and grit, especially in the wet, where objects are more likely to attach themselves to the tyre and then on the next rotation, bed themselves in and pierce the inner tube.   Also, keep an eye out for potholes, sure to cause problems…and can be hidden as puddles in the wet.

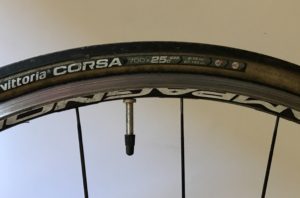
In terms of preparation, apart from having the essentials, (and this may sound like pedantry), align the tyre label with inner tube value (when both are seated on the wheel).  Some folks think this is for aesthetics, but has a very practical purpose.

Imagine you have a puncture, once you’ve removed the inner tube you do a check on the tyre, it looks okay so you put in a new tube, or repair the old. Two minutes later the tyre is flat again, and you question if you pinched the tube putting it on. Chances are that you missed the one, two or three small thorns or pieces of sharp flint or gravel embedded in the tyre which caused the original puncture. But how do you know where they might be hiding ? If we align the valve with the label, when we remove the tube, pump it up just a little to find the hole(s),  by holding the tube against the tyre, lining up the label and tube, it will become apparent where and how many piercings you have, and where the little blighters might still be sitting in the tyre.

First check the outside of the tyre for the obvious offending shards, then turn the tyre inside out, use your finger to feel inside, taking care not to cut yourself, then bend the tyre inside out to expose the inside, it should be possible to find any thorns, flint, etc poking through.

Personally, I choose Vittoria Corsa tyres which have a cream inside, which is great for seeing offending objects if they are poking through the tyre (see left, you can spot the piece of flint).

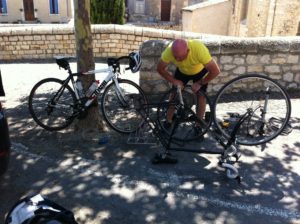
Why am I passionate about this ? Once when riding with good friends in the rain, we had a puncture while being in the middle of nowhere. It took three attempts to find the tiniest pieces of flint in the tyre, and by the time we did the rain showers had reduced us to shivering wrecks. Only when we completely removed the tyre and turned it inside out did we spot the small pieces of flint.  If the label had been aligned with the valve we’d have spotted where the problems were so much quicker. Luckily we had spare tubes or we would have been royally up the creek. A harsh but necessary lesson I pass on to you.

Getting the tyre off is usually the easiest part.   However if you are using deep section rims then there are two things to remember (1) make sure your spare inner tube’s valve is the right length.  If it is too short, then you are screwed, and (2) check your tyre levers can cope with the deep section rim…I was on long ride, the London Revolution (2 days, 186 miles) and in the middle of the Chilterns when my friend had a puncture.   Unfortunately his levers were useless with his Zipp wheels, thankfully I had a pair long enough to be able to get the tyre off.

As I said before,  there are numerous videos on youtube showing you how to re-seat a tyre, so I wont repeat that, but did want to give you some tips that they may not tell you.

  1. Add a little air to the new inner tube so that it sits in the rim, but don’t put too much in.  This helps prevent it being squashed or pinched.  If you only have CO2 canisters, don’t use them at this stage, instead open the valve and gently blow into it….that’s sufficient.
  2. Before you re-seat the tyre, use your fingers to break the seal between the tyre and the rim on the other side so that as you re-seat the tyre you can stretch it….making those last few and hardest inches much easier to manage.
  3. Start at the valve and slowly seat the tyre, continually stretching the tyre along its length
  4. I would advise using both hands (wearing gloves) and by using the palm of your hand, roll the tyre into place
  5. Use tyre levers only when absolutely necessary; the risk of pinching the tyre are high and may undo all your good work.
  6. When the tyre is back on the rim, check both sides to see that you have not pinched the inner tube.  I usually squeeze the tyre to make sure that the inner tube is not poking out.
  7. Gently inflate the tyre and make sure that it is seated evenly around the rim, there should be no high points, poke the valve in a little to make sure it is not been squeezed.
  8. The nut that screws onto the valve is optional…pros don’t use them as it slows down the process of changing the inner tube, but it is your choice…but if you do, don’t tighten it until the tyre is fully inflated.
  9. If you are using CO2, use one with a controllable valve so that you can govern the amount entering the tyre, you don’t want it blowing up the tyre in a few milliseconds because (a) keep checking that the tyre is seated as you inflate and (b) the speed of release of Co2 from the canister may take you by surprise and it may jump off the valve, leaving you with a empty tube and empty canister.   Wear gloves to avoid your hands getting frostbite burns (a painful experience).   You will also need to deflate the tyre and replace the CO2 with air as soon as you can as CO2 will leak through the inner tube in a matter of days (it sure confused me the first time it happened).

As an aside, as a youngster we used to tie a small of wire around the forks so that it was just touching the tyre, so that if we picked up anything and it stuck on the tyre it would be wiped away before it got a chance to bed in on the next rotation – I don’t know if this was effective, but a lack of products on the market that do this suggests we were wasting our time 🙂

So, the long and the short of it is that you will at some point get a puncture. If you take a few of these steps to reduce the chances and be prepared for them, when it happens it becomes an inconvenience and not a disaster.

If you want to dive deeper, I cannot recommend more highly the article on tyres/tubes by Sheldon Brown.

Next time we will delve into other ‘mechanical’ problems (other than caused by poor maintenance or bike fit) that can occur on rides, such as dealing with buckled wheels, snapped chains, broken hangers/derailleurs, stuck gears, and broken cables…I may think of a few more along the way…..

Happy Riding,  Grant